Telnet is a protocol that provides a command line interface for communication with a remote device or server. Sometimes it is employed for remote management but also for initial device setup like network hardware. It stands for Teletype Network, but it can also be used as a verb; ‘to telnet’ is to establish a connection using the Telnet protocol. An alternative to telnet on MAC is “netcat“. Here is a post on “how to install netcat on MAC OSX”.
This tool might not be available on recent version of MAC including Mojave or High Sierra. A simple of installing telnet could be using Homebrew.
Steps to Install Telnet:
First Open the terminal and install Homebrew:
/usr/bin/ruby -e "$(curl -fsSL https://raw.githubusercontent.com/Homebrew/install/master/install)"Now Install Telnet with brew
brew install telnetOnce it is installed, you can verify by running “telnet” in the terminal
Here is a demo of “How To Install and Use Telnet”
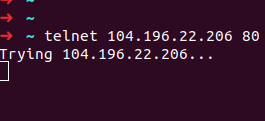
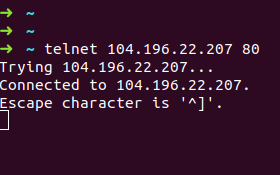
Telnet is installed now. Try telnet to check connection to a server with IP 104.196.22.207 on port 80, run the following command
telnet 104.196.22.207 80This command will tell you if your machine/computer is able to connect to “54.32.56.103” on port “80”. If the port is open, there must be some process listening/running on that port for telnet to be successful. Below is an example of output of above command if the the connection is successful.
If the port 80 is open and there is no process listening on port 80 then telnet will show it is trying to connect and after sometime connection timeout will happen. Following is an example of unsuccessful connection on port 80: